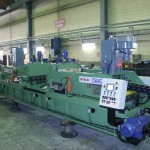
ON-LINE ULTRASONIC TEST SYSTEM
CONTENTS
A- SYSTEM:
1. Ultrasonic Evaluation Electronics (including cabinet, air conditioner)
1.1. PC based evaluation electronic (including monitor, keyboard and mouse)
1.2. Probes and Probe Cables
2.Test Mechanics
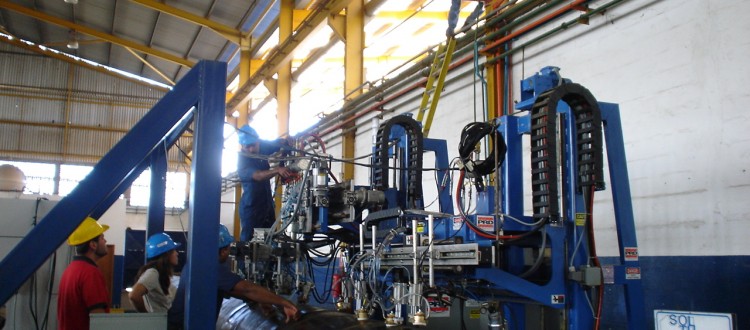
2.1. Mechanics for Weld Test
2.1.1. Cantilever – Height Adjustable Lifting Frame
2.1.2. Rotary Table
2.1.3. Probe Holder Mechanism (including weld seam tracking device)
2.1.4. Probe Holders (including air cylinder and valve)
2.2. Mechanics for Body Lamination Test
2.2.1. Cantilever – Height Adjustable Lifting Frame
2.2.2. Oscillating Mechanism
2.2.3. Probe Holders
3. Water Supply Unit
3.1. Water Tank
3.2. Coupling Water Distributor
3.3. Pipe Cooling Nozzle (including fixing rods and connectors)
3.4. Hoses, Solenoid Valves, Valves
4.Air Supply Unit
4.1. Pressure Valves
4.2. Water Separator
4.3. Oiler
4.4. Hoses
5.Paint Marking Unit
5.1. Spray Gun and Paint Reservoir
5.2. Solenoid Valves
5.3. Spray Gun Fixing Rods and Connectors
6.Data Record
6.1. Software
6.2. Printer
7.Weld Seam Tracking
7.2. Automatic (Laser Seam Tracking)
7.3. Laser Pointer and Camera Fixing Rods and Connectors
8. Electrical Control Panel (Relays, Contactors, Switches)
9. Operator Control Panel (Push buttons, Switches, Lights)
B-TECHNICAL DATA OF THE PIPES:
Pipe Diameter: 200 mm – 3000 mm
Wall Thickness: 3 mm – 25 mm
Pipe Length: On line – endless
Weld Speed: max. 2.5 m/min.
C-TEST TYPES:
Submerged Arc Weld (S.A.W.) Test
1.1. Longitudinal Weld Defect
1.2. Transverse Weld Defect
2.1. Lamination
2.2. Inclusion
Body Lamination Test (Base Material)
3.1. Lamination
3.2. Inclusion
D-DETAILS OF THE TEST TYPES:
- 1. Submerged Arc Weld (S.A.W.) Test:
The probes are lowered to the top of the pipe until reaching the set-up distance between pipe surface and mechanism.
The probe holders are lowered by air cylinder to touch the pipe surface and positioned by shifting device for the set-up distance between weld seam center and probe index point. The calibration is done according to related specification after receiving proper water coupling between pipe surface and probes.
The test is carried out according to the pulse-echo method for longitudinal weld defects and through-transmission method for transverse weld defects. Angle beam probes are used for longitudinal and transverse weld defects.- 1.1. Longitudinal Weld Defect:
Two angle beam probes are facing each other and operate in pulse-echo mode for defects and in a through-transmission mode for coupling and performance check of the probes. - 1.2. Transverse Weld Defect:
Two angle beam probes operate in through-transmission mode. The transmitting probe transmits the sound beam at an angle of 45 degrees to the weld. If a transverse defect exists, the sound beam is reflected from there and received by the second probe facing the first one.
- 1.1. Longitudinal Weld Defect:
- 2. Heat Affected Zone (H.A.Z.) Test:
The laminar defect in Heat Affected Zone is detected by immersion straight beam probes. The immersion probes are
coupled via water column. The probes operate in pulse-echo mode. The test is performed by means of evaluation between interface echo and first back wall echo. The possible time variation in water column is compensated by the echo start system. - 3. Body Lamination Test:
The base material is tested after pipe forming and internal/external submerged arc welding are completed for lamination and inclusion.
Oscillating mechanism is lowered by cantilever lifting frame. The probe holders are lowered by air cylinder until they are placed on the pipe surface. The oscillating drive is adjusted for range according to the strip width of the base material of the pipe. Probes are moved back and forward with an oscillating device on the pipe surface. The probes are coupled via water gap. Any lamination or inclusion can be detected by evaluation electronically and shown on the monitor and marked on the pipe surface by paint spray gun. The test is performed according to pulse-echo method using straight-beam twin crystal probes. Each probe scans a part of the distance between two neighbor weld seams. The probes can also be arranged to the left and right of a weld seam.
